
Ankita enjoys exploring and writing about technology. Starting as a script and copywriter, her keen interest in the digital world pulled her towards technology. With GT, she has found her calling in writing about and simplifying the world of tech for others. On any given day, you can catch her chained to her laptop, meeting deadlines, writing scripts, and watching shows (any language!). Learn about our Tech Review Board
Updated August 27, 2024
Quick Tips
Step 2: Click on View and uncheck the Hide extensions for known file types option.
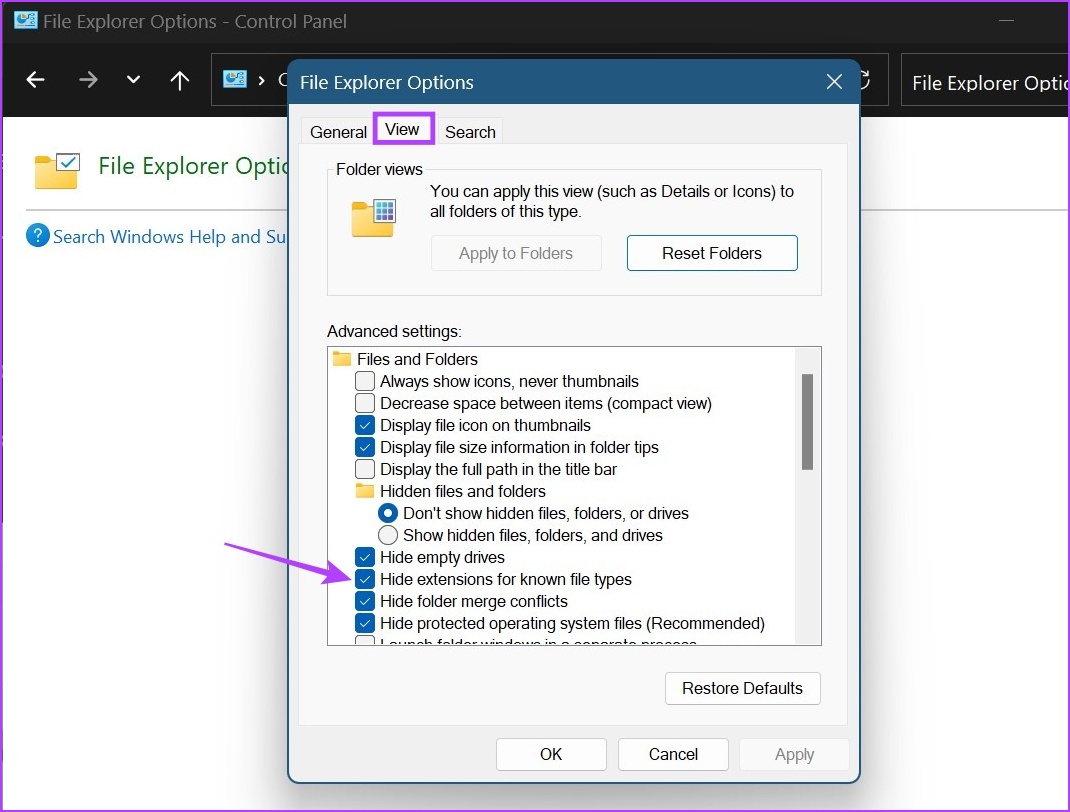
Step 3: Click on Apply followed by OK.
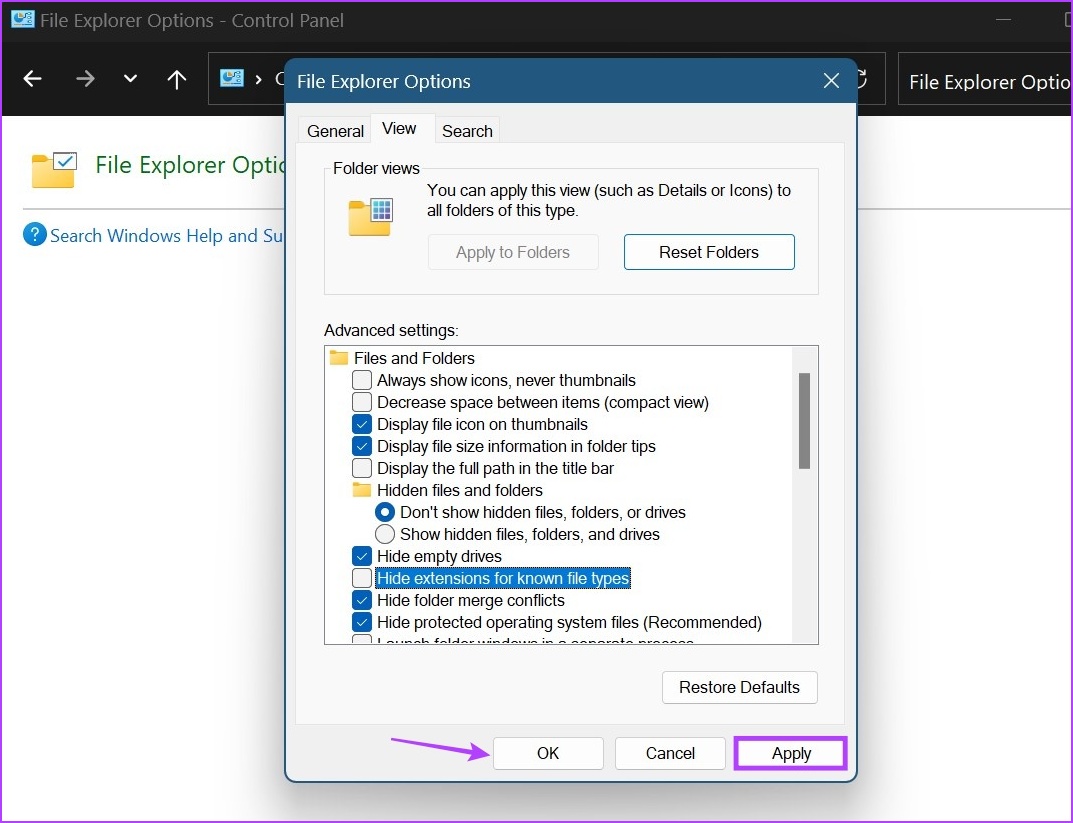
This will enable file extension names. Now, go ahead and change the file extension on Windows 11. Ensure you check the hidden folders if you’re unable to find the file.
Once the file extension is visible for all the files, we can now proceed with changing the file type. As mentioned above, there are three major ways you can convert file types in Windows 11. Let’s have a detailed look at them all.
When changing the file type using the rename option, all you need to do is select the file and change the name of its extension. Follow the below steps to do it. Ensure the before and after file extensions are similar to each other or your file might get corrupted. Here’s how to do it.
Step 1: Open the relevant folder and click on the file. Click the Rename icon.

Step 2: Rename the extension.

Step 3: Then, click on Yes. This will change the file type.
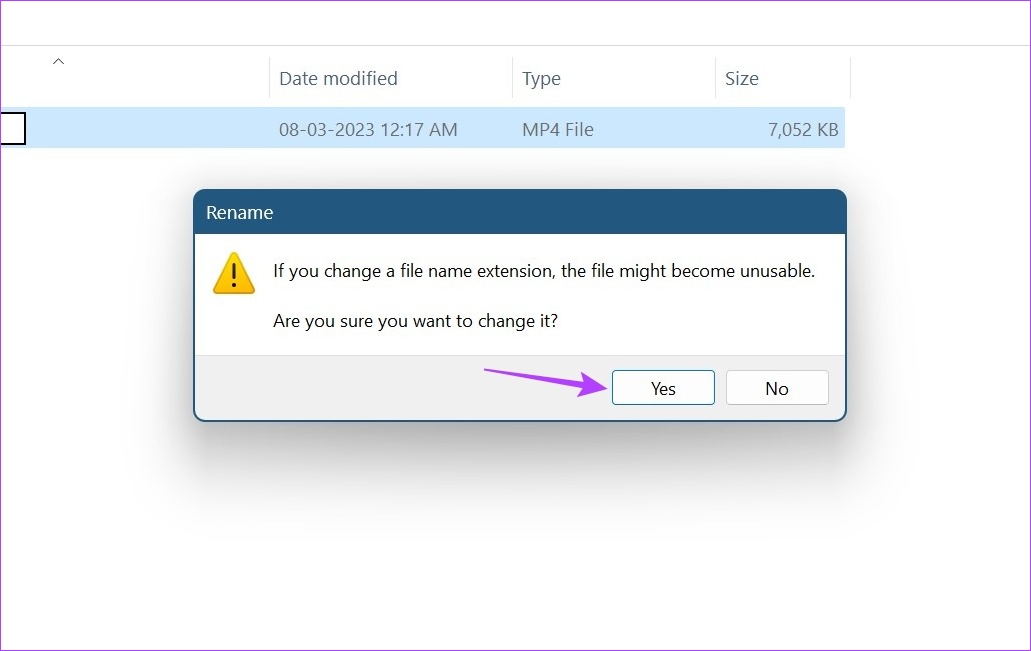
Once done, try opening the file again to check. This should especially be done when converting video files as they might change their file extension name while still retaining their original extension characteristics.
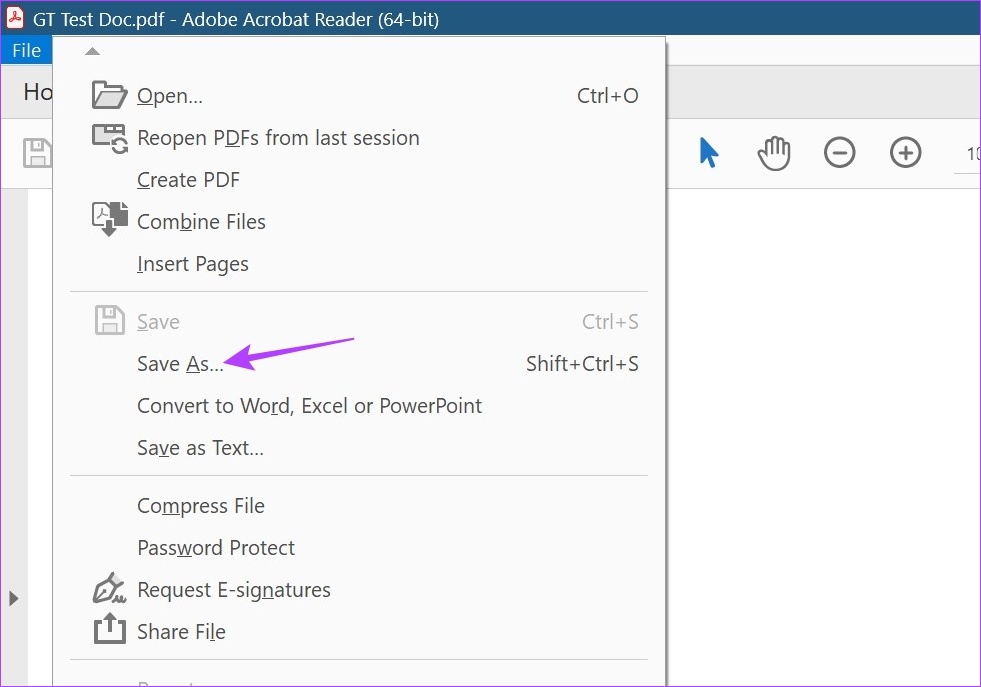
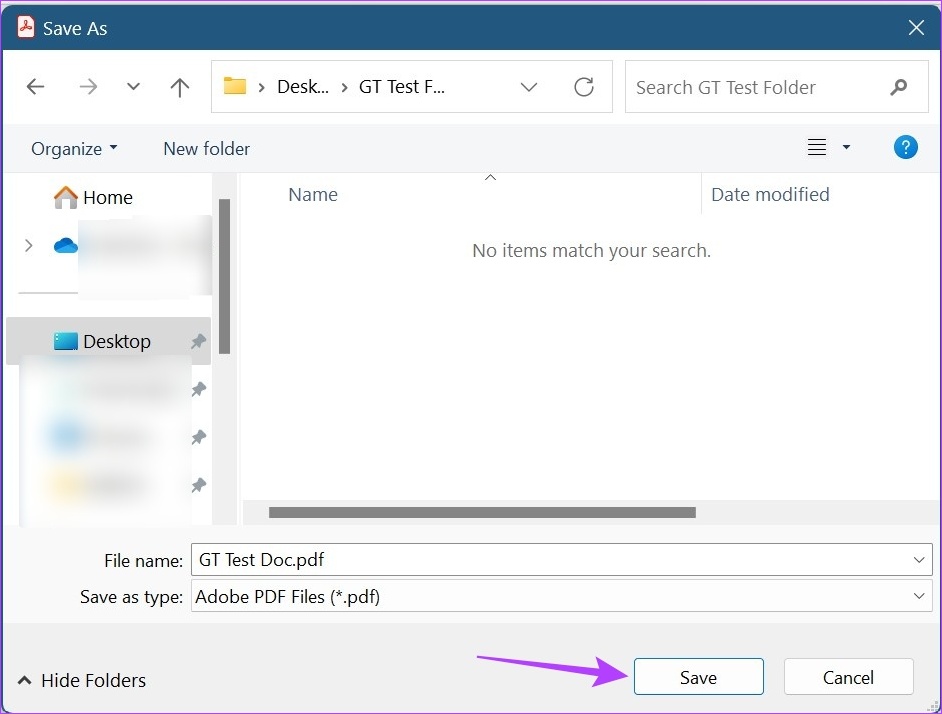
With the save as option, you can simply open the file extension in the relevant software. Then, using the Settings menu, save the file again, but this time in a different format. For demonstration purposes, we will be using a .pdf file with Adobe Acrobat PDF Reader. Here’s how to do it.
Step 1: Open the relevant file in Adobe Acrobat PDF Reader and click on File.

Step 2: Here, click on Save As.
Step 3: Select the format you want to save the file as.

Step 4: Select the folder you want to save the file to and click on Save. This will convert and save the file.
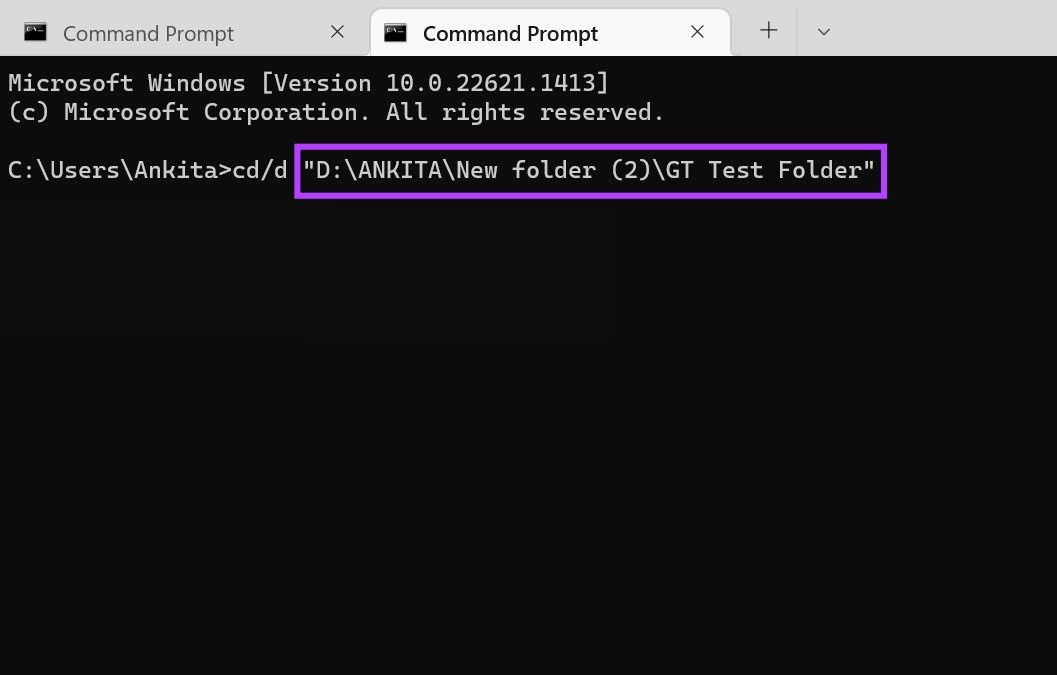
The third and last way to change the file type on Windows 11 is by using the Command Prompt. Here, you can either change the file extension for individual files one by one or change multiple file extensions at once. Here’s how to do it.
Step 1: Go to the relevant file and right-click on it. Click on Copy as path.

Step 2: Now, open Command Prompt, type the following command, and press enter.
cd /d "name of the folder path copied eariler"
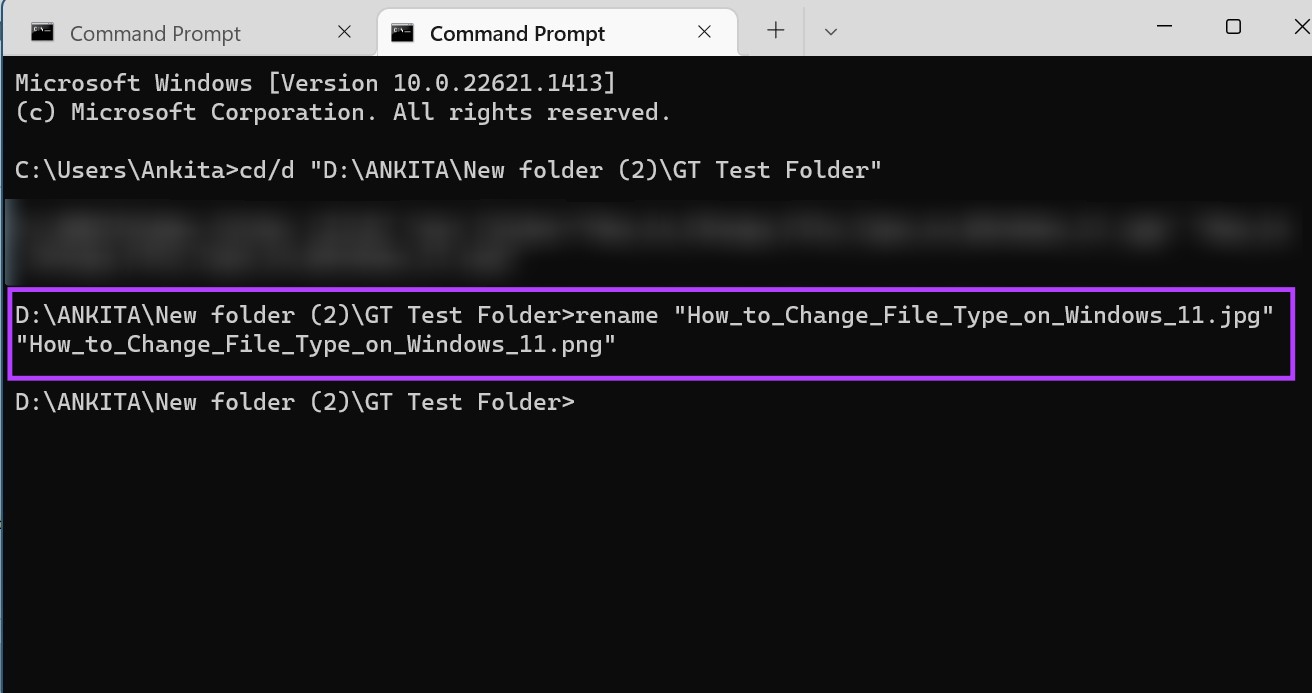
Step 3: Here, type the following command and press enter. This will change the file format for the individual file.
rename "file-with-extension-1" "file-with-extension-2"
Note: Replace file-with-extension-1 with the file name and its original extension followed by the file name and the extension you want to convert it in.
Step 1: Go to the relevant file and right-click on it. Click on Copy as path.
Step 2: Open Command Prompt, type the following command, and press enter. This will open a new line with the file name.
cd /d "name of the folder path copied eariler"
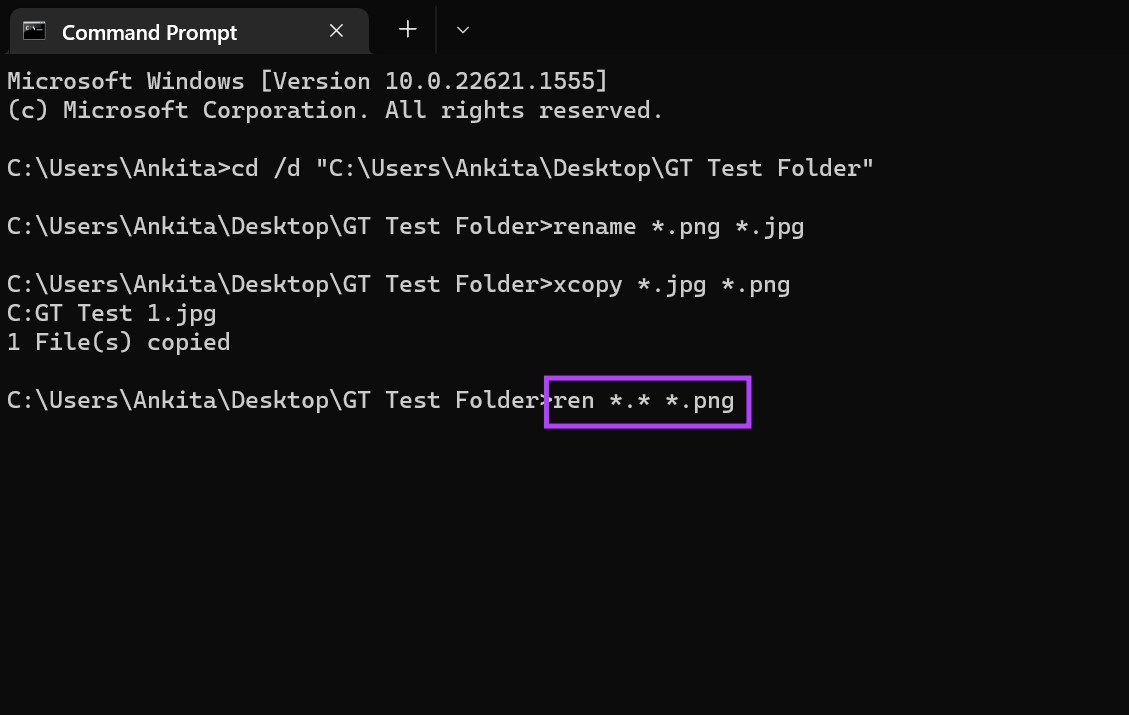
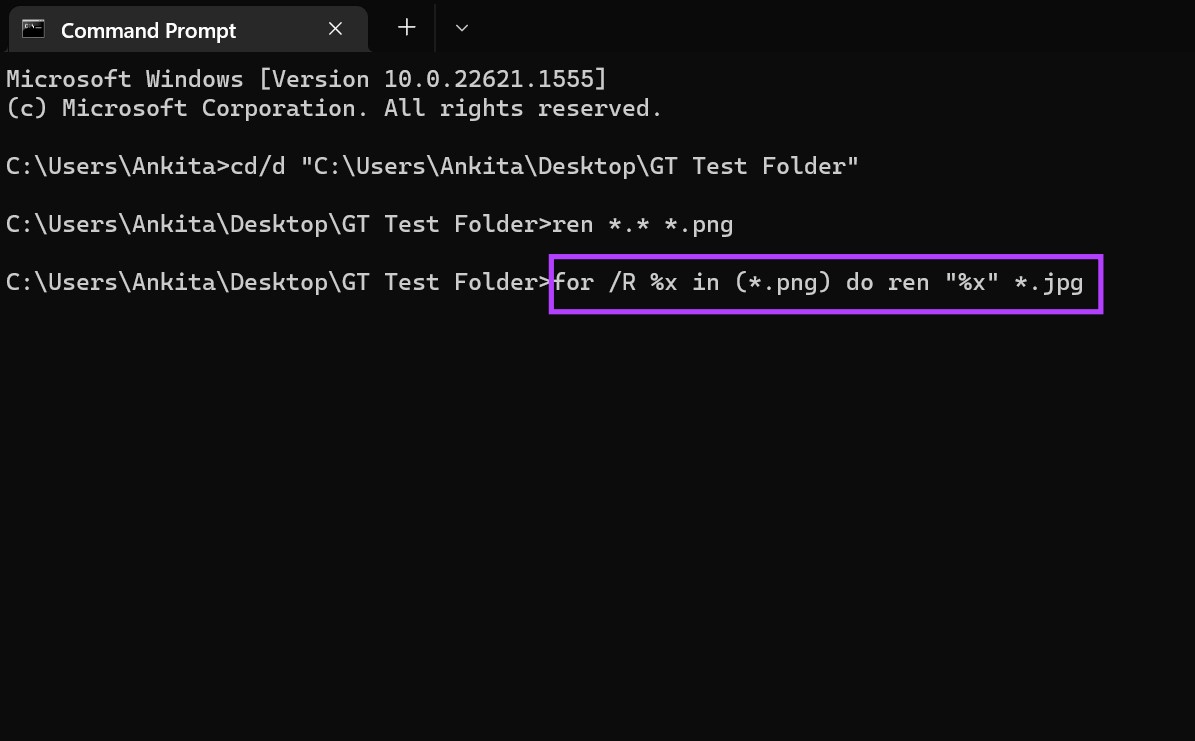
Step 3: According to your requirement, type any of the below-mentioned commands and press enter.
rename *.fileextension1 *.fileextension2

xcopy *.fileextension1 *.fileextension2
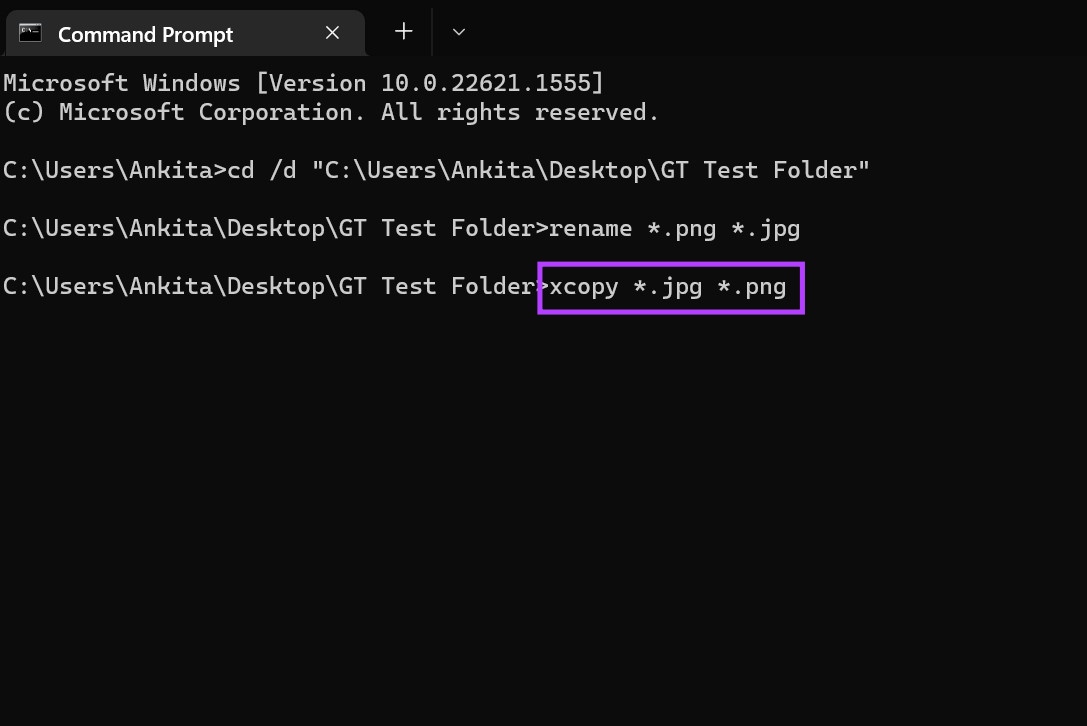
ren *.* *.newfileextension
for /R %x in (*.extension1) do ren "%x" *.extension2
Once you press enter, the command will be executed accordingly. Now, go to the relevant folder and check if the changes have been made.
Yes, you can set default file types in Windows 11. Open the Settings menu > click on Apps from the side menu > click on Default apps. Using the search bar, look for the app for which you wish to set the default file type > select the default app and click on OK.