How to Make Soap for Kids

Making soap for and with kids can be a lot of fun and doesn't have to be complicated. Follow these instructions to easily make your own soap using a melt and pour base.
These cute soaps are a great way to enhance your kids' bath time, just like bath bombs. The best part is that you can involve them in making their own bar of soap, which is so much fun!

Working with Melt and Pour
When working with melt and pour soap, all you need to do is cut, melt, add color and fragrance, and then pour it into molds. It really is that simple!
This method doesn't involve using lye (sodium hydroxide) like cold process soap making, and there's no chemical reaction to worry about. Phew!
This project can be a fun and educational experience for older kids who want to be involved in every step, but keep in mind that adult supervision is required as it involves working with hot soap. But even preschool kids can join in and have fun, especially when it comes to cutting the soap into cubes, as my son loved to do when he was little.
Melt and pour soap can also be customized in many ways to really express their creativity.
Let them choose:

- what color to use (you can use food coloring or liquid soap colors)
- what scent to use (can either be essential oils, fragrance oils or unscented)
- what shape mold to use - it doesn't have to be dinosaurs, there are lego bricks, unicorns, etc
- to add small toys - if so, use a clear glycerine soap base, so the little toys can be visible, and choose something that's not too hard or edgy
Disclaimer: This post containes affiliate links, meaning at no additional cost to you will I earn a commission if you click through and make a purchase. Read my full disclosure here.
Equipment
- Dinosaur Silicone Mold
- Round Silicone mold
- Knife
- Small Glass Measuring Cup or microwave safe bowl
- Small Plastic Spoon or Spatula
- Spray bottle for rubbing alcohol
Ingredients
- Clear Melt and Pour Soap Base - you can use a white soap base as well, but the soap won't look transparent, and you may have to add a little more color
- Colorant - I mixed and matched different mica powders for this project because I love the way they shimmer, but liquid soap colorant or food coloring also works. (I paired together the following micas: violet petal-tail green, blue lagoon-sunset pink, and pink watermelon-blue lagoon)
- Lavender Essential oil
- Isopropyl Alcohol (Rubbing Alcohol)
How to Make DIY Soap for Kids


This will make 6 round soaps, you can repeat the process with different colors as often as you like.
- Make the Dinosaurs: cut 3 cubes (~ 2 oz) of melt and pour soap base into small chunks and add to a glass measuring container and melt in a water bath/double boiler over medium heat or in the microwave on 15-20 second burst.
- Add ⅛ of a teaspoon of mica (color of choice) and stir
- Pour the soap into the cavities of the dinosaur soap mold
- Let sit until fully cooled (15-20 minutes)
- Rinse and remove any residue from the glass container with warm water, dry
- Make Bottom Layer of Round Soap: cut 4 cubes of soap base (~ 6 oz) into small chunks and place in the glass container in a water bath over medium heat or in the microwave on 20-second bursts
- Add ⅛ teaspoon of mica (color of choice) and 15 drops of essential oil and stir
- Pour soap base into 6 round molds filling each about ¼ of the way up.
- Spray the surface of the soap with rubbing alcohol and let sit to fully cool and harden (about 20 minutes)
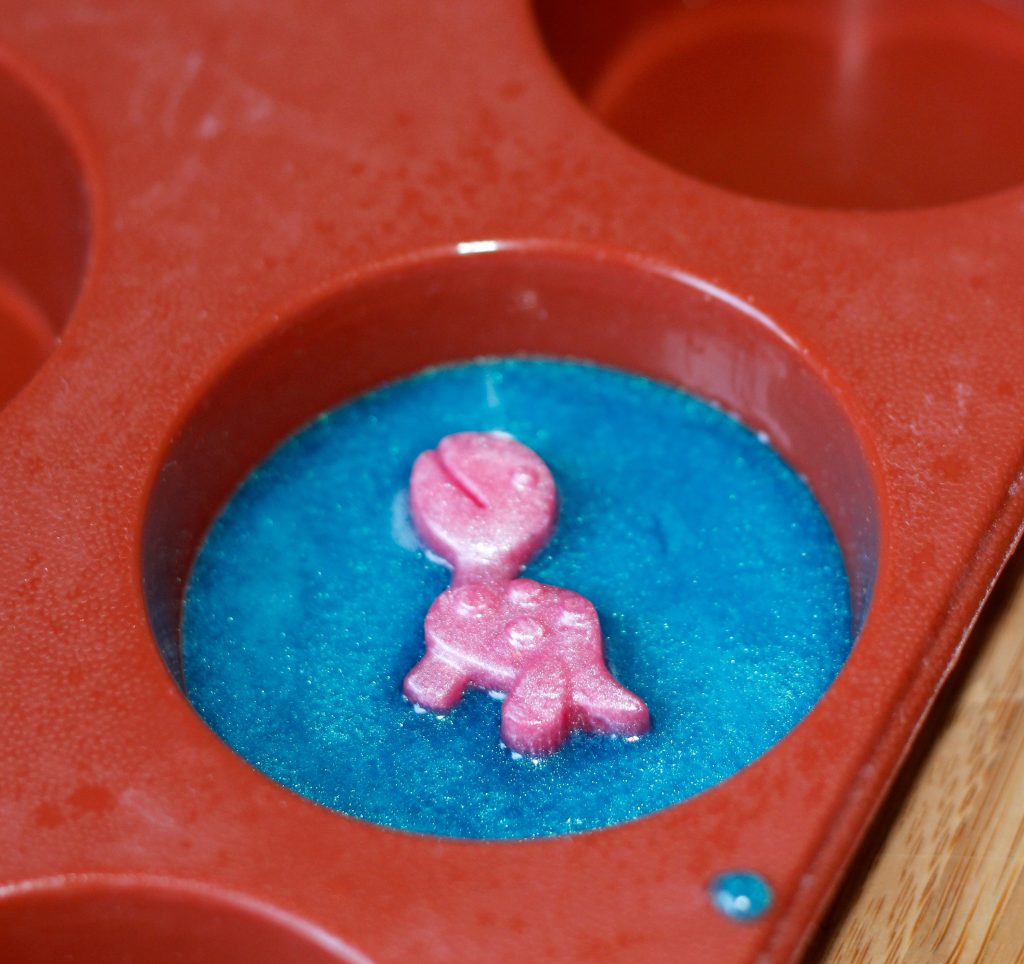
- Once the soap is cooled, pop dinosaur soap out of the mold and place each one in the center on top of the soap
- Make The Top Layer: cut 4 cubes of soap base (~ 6 oz) and place in the glass container (don't worry about it being clean this time since it's the same color). Melt in a water bath over medium heat or in the microwave on 20-second bursts
- Add ⅛ teaspoon of mica (same color as for the bottom layer) and 15 drops of essential oil and stir
- Divide the soap evenly between all 6 rounds. The dinosaurs should be sticking out a bit, so that details are visible
- Mist the top of the soap with rubbing alcohol holding the spray bottle up high (not too close) and let the soap fully cool
- Take dinosaur soaps out of the mold and store in an airtight container or small plastic bag to protect them from moisture
Until next time. Happy Tinkering!

-->
